Maps & Indicators - Configuring
This section covers how to configure the more advanced Map Indicators, including Pin Status, Cluster Pins, Lines, and Filters. For setting up a Map View object and adding basic indicators, see Get started.
Configuring indicators
The following indicators are available in the Map Indicators object library and are added the same way as described in Get started. Each indicator has properties that must be configured for it to work. The sections below describe them.
Pin Status
Pin Status objects are the key to connecting a Map View to Workviews. They are
implemented the same way as a regular pin, but with more logic behind them. When
successfully linked to a Workview, they allow the user to navigate directly to that
Workview on click. The background colour of the pin also displays the live status of the Workview: active, warning or alarm. The pin can
additionally display the number of active alarms and warnings. Together, these features
make pinStatus objects the foundation for system control through a map.
Note
To display a different icon on the pinStatus object, change its SVG or make a
copy of the object and change the SVG on the copy.
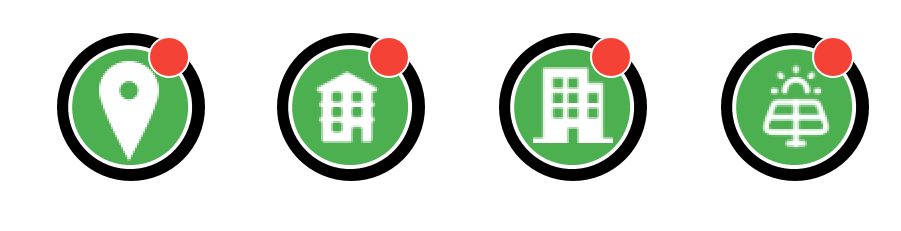
The library also has ready-made variants of pinStatus with their own icons, such as
pinStatusAppartment, pinStatusOffice and pinStatusSolarPark. Example maps using
them are included in the main menu under Dashboards & Kartor.
The following properties are set on a pinStatus object:
- linkedView — The Workview or folder the pin opens on click, and whose state it
shows. A path ending in
.kvieopens that Workview. Any other path opens the folder in the menu. A pin without a linkedView zooms the map in two steps when clicked. - systemName — The name shown on the hover card.
Hovering over a pin shows a card with its name and state: Offline, Normal, Warning or Alarm. A cluster pin's card shows how many pins it holds, for example "(4 buildings)".
Direct navigation
The Direct navigation (map) setting, under Settings → Navigation, decides what a
click on a pin does. It is on by default, and a click opens the pin's linkedView at
once. When it is off, the pin instead stores its details on the Map View as
MapSelectedPin, MapSelectedLink, MapSelectedAlarm and MapSelectedStatus. The
example maps show them in their Info about selected pin panel, with a Go to view
or Go to folder button. A map of your own needs a panel that reads these properties.
To integrate an Alarm object with a map and status pins, see Connecting Alarm to Map View.
Cluster Pins
Cluster pins can be used to group underlying pins into one, reducing clutter on the map and improving navigation. A cluster pin is created the same way as a regular pin, but with additional properties.

The following properties must be configured:
- areaName — The name shown in the tooltip, helping the user with navigation.
- zoomTarget — Controls the zoom level when the pin is pressed. In combination with the map's zoom ranges, this gives seamless navigation: pressing the pin shows its child pins and hides the cluster pin.
- roi — The core of the cluster pin. Determines the range within which the cluster collects other pins as its children. If a pin falls within the roi of two cluster pins, the closest one will claim it as its child.
The cluster pin also reflects the status of its children through its background colour and displays the number of connected children.
To enable cluster pin functionality, add the following to the Map View onLoad script:
scMap.mapView = this;
scMap.initClusters(this);
if (scMap.alarmList) scMap.updateAlarmList(this, scMap.alarmList);

Lines
Lines are useful for visualising paths or pipes in an application. Since pipes span
multiple coordinates, they require more configuration than other indicators. Lines come
in three sizes: SmallPipeLines, MediumPipeLines, and MainPipeLines.
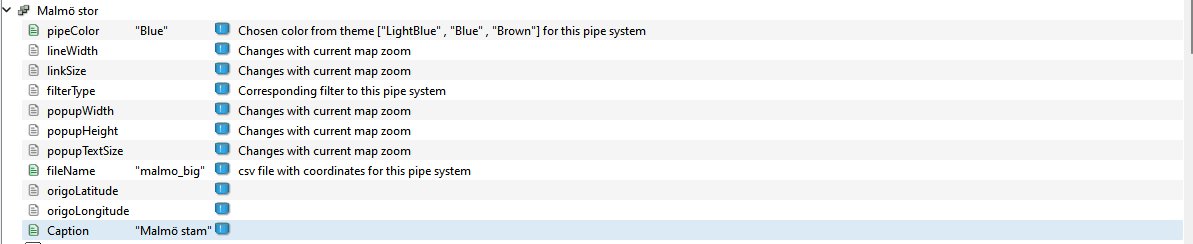
The following properties are available:
- pipeColor — The colour of the line. Colors can be selected from the mapIndicators theme, which can be found in the project tree under Themes. To add custom colours, add them to the mapIndicators theme and reference the colour name here.
- lineWidth (optional) — Alters the line width. This value is affected by zooming, so it acts as a start value rather than a constant.
- linkSize (optional) — Each line segment is connected by an ellipse called a Link. Alters the size of the Link.
- filterType — Used by the application to filter different networks. This does not need to be filled in manually.
- popupWidth (optional) — The width of the popup.
- popupHeight (optional) — The height of the popup.
- popupTextSize (optional) — Alters the font size of the popup text.
- fileName — The name of the file in the
mapPathsfolder that holds the coordinates for the line network, without the.txtextension. The file can hold at most 50 coordinate rows, which draw 49 segments. - origoLatitude and origoLongitude — Only present on
MainPipeLines, and not used. - Caption — The header displayed in the map indicator.
Clicking a segment of a line network opens an info popup. Each segment object
(MainLine1, MediumLine1 or SmallLine1) has its own Header and Text for that
popup. An empty Header falls back to the network's Caption, and an empty Text
leaves the popup body blank.
Not on remote and web clients
Line networks are not shown on remote and web clients.
Example configuration:
CSV file with coordinates
To link a line network to a coordinate file, create a .txt file in the project's mapPaths folder. If the folder does not exist, create it.
The file has a lat,long header row followed by two comma-separated columns, latitude and longitude, that define the path from start to end. The following example covers a network over Malmö, Sweden:
lat,long
55.60993454611365,13.067280081496149
55.60754066940655,13.068012894315629
55.59706293405991,13.064900367032141
55.586229083148936,13.06210645824121
55.575010991019305,13.049196672585212
55.56406209265025,13.023184417468679
55.56771206450431,12.986285551858925
55.57070805669029,12.948037902764336
55.58835253553419,12.947941561647154
55.597117367875725,12.970678198813472
55.603812162853316,12.994474594377622
55.607077501929616,13.02193197387472
55.607186342050994,13.0452466622596
55.61529406922991,13.083397968508196
To link the file to a line group such as MainPipeLines, set the fileName property
to the file name without the extension, here malmo_big:

Give the file a unique name
The file name must not match any other name in the Data Store, such as an alarm
group. If it does, the line network is not drawn and a scMap.readFromCSV() error
is written to the log.
Line geometry properties
Each line group contains individual line objects named MainLine1, MediumLine1 and
SmallLine1. These objects carry the geometry of the segment they draw. The line group
fills in the coordinates from the file named in fileName when it loads:
- startLatitude and startLongitude — the coordinate the segment starts at.
- endLatitude and endLongitude — the coordinate the segment ends at.
The remaining geometry properties (xPos, yPos, xLength, yLength,
xStartLink and yStartLink) are calculated by the scMap script from the
coordinates above and the current map frame. They do not need to be set by hand.
scMap anchors these offsets to the corner of the visible map frame. A pipe spanning a
large geographic area is therefore positioned correctly at high zoom, rather than from a
fixed point that may fall outside the current view.
Filter
Filters allow users to focus on a specific set of lines or networks by toggling their
visibility. Any line network is automatically registered with the filter, so no
additional configuration is needed. Add a FilterRow object to the Map View the same way as any other object. A single Filter button does not work on its own.
The FilterRow shows one button per line network, for up to 8 networks. All networks
start hidden until a filter is selected, and clearing every filter hides them all again.
Next Steps
- Extending — creating custom map indicators