Your first tag
This guide walks through connecting a single tag end-to-end, from creating an OPC UA tag to verifying it on a Process popup. It is the quickest way to confirm that your project is correctly set up and ready for implementation.
Before getting started, make sure you have the template project open in WideQuick 14 or later. If not, see Download WideQuick MOD
Step 1 - Set up a connection
The first step is to set up a connection in WideQuick Designer®. For this example
an OPC UA connection will be used, named OPC. A full guide on configuring OPC UA
can be found in the WideQuick Manual by pressing F1 in WideQuick Designer.
The following connection types are also supported:
- MQTT
- BACnet
- Modbus Serial
- Modbus TCP/IP
- OPC Server
- OPC UA
Step 2 — Create the tag in WideQuick
In WideQuick Designer®, open the Tag Editor and click Browse to open the OPC UA browser. Navigate the server tree to find the signal you want to import and select it.
Once selected, rename the tag in the WideQuick name field to follow the tag structure:
OPC.AS01.VS10_PV01_IO
This tag consists of:
- Connection —
OPC - Device —
AS01 - System —
VS10 - Object name —
PV01 - Suffix —
_IO
For more information on the tag structure see Tag Structure.
Step 3 - Create a Workview
In WideQuick Designer®, create a new Workview inside System 1. This will make it automatically appear in the navigation menu. For more information on how the navigation works see Navigation — Get started.
Step 4 - Place the motor object
Open the new Workview and drag the dynMotorPumpR_000 object from the Motors
object library into the view.
Select the DynTouch object inside the group and navigate to the Properties tab.
Enter the following:
- Connection —
OPC - Device —
AS01 - Sys —
VS10 - ObjectName —
PV01

Tip
The dynMotorPumpR_000 object is a pre-built object from the Motors object
library. To learn how to create your own custom objects see Create an Object.
Step 5 - Connecting suffix aliases and verifying
Configuring the animation
Start the project and navigate to Settings → Suffix → Suffix - Alarms. Select 4 - Active and click Add new suffix alias in selected category. When prompted for a name, enter On and click Ok. Click Write changes to DB to save.
The suffix alias On is now part of the 4 - Active group. Next, select On
in the tree view and assign _IO to the Suffix field.
For more information on how the animation system works see Workview Animations.
Configuring the Process popup
The next step is to connect the suffix to the Process popup, so that clicking the object opens the popup and allows the signal to be manipulated. Navigate to Settings → Suffix → Suffix - Popups.
This view shows all configured standard popups. To create a custom popup see
Create a Popup. Select Process and click Add new
suffix alias in selected category. When prompted, name the new suffix alias On
for consistency. Then select the On alias and assign _IO to the Suffix
field.

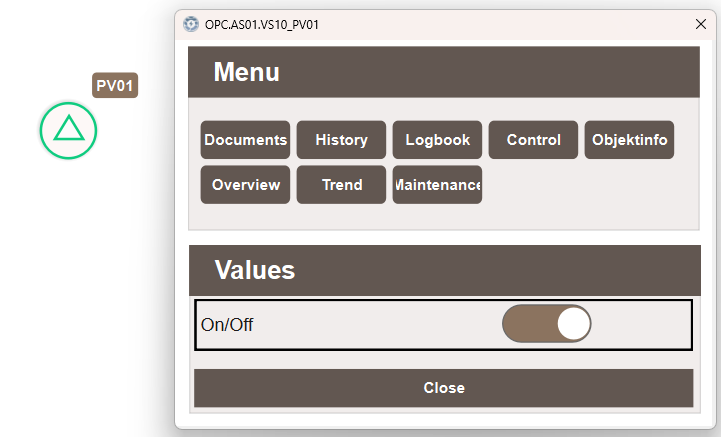
Verifying
Navigate to the view containing the motor object and left-click it to open the
popup tab. Select Process — the toggle for the _IO signal will be available
here. Toggle it to true and verify that the green light on the motor object
becomes active, confirming that the tag is correctly wired end-to-end.
Tip
If the green light does not appear, verify that the tag name in the Tag Editor
matches the properties entered on the DynTouch object exactly, including
capitalisation.