Maps & Indicators - Get started
Requirements
The following scripts are required to use Maps & Indicators and all related functionality covered in the Maps & Indicators guides:
scMapscMaintenancescDatabasescThemesscAlert
And the following Object Libraries:
Map IndicatorsWEATHER
This section covers how to set up a Map View object in WideQuick and how to add basic indicators. For configuring more advanced indicators such as Pin Status, Cluster Pins, and Lines, see Maps & Indicators — Configuring. For connecting an Alarm object to a Map View and creating custom indicators, see Maps & Indicators — Extending.
Setting up a Map View object
To use Map Indicators, a Map View object is required. It can be found in the Objects Toolbar in WideQuick Designer®:

Place it in the view where you want to display your map.
Once placed, the Map View object needs to be linked to the scMap script. Do this
by adding the following onLoad script to the Map View object:
scMap.mapView = this;
scMap.initClusters(this);
if (scMap.alarmList) scMap.updateAlarmList(this, scMap.alarmList);
All objects inside a Map View have a property called geo, which contains the
geographic coordinates of the object. In order for the indicators to render correctly
as the user pans and zooms, the Map View needs to track the scale and visible
area of the current viewport. This is done by adding the following script to the
visibility dynamics of the Map View:
mapRatioWidth = this.width * scWM.scalingFactor / this.visibleRect().width
mapRatioHeight = this.height * scWM.scalingFactor / this.visibleRect().height
weatherLat = this.latitude
weatherLon = this.longitude

var web = false;
var sysInfo = app.System.info()
if (sysInfo.productId == sysInfo.WQWeb) {
    web = true;
}

if (web && (app.subNavMenu.visible || app._subNavRemoteVisible)) {
    this.width = 1300
} else {
    this.width = 1620;
}

return true;
You are now ready to add Map Indicators.
Adding basic indicators
Map Indicators are found in the Map Indicators object library in WideQuick Designer®. To add an indicator, drag it from the object library and drop it into the Map View object. Most indicators require a longitude and latitude to be set, which determines where they appear on the map.
The following sections describe each basic indicator and any configuration required.
Zoom button
Adding a Zoom button is straightforward — it has no properties to configure. Add it as you would any other object in a Map View. If you are unsure how to do this, consult the WideQuick help by pressing F1 in WideQuick Designer®.
The Zoom button automatically repositions itself to the bottom right corner of the Map View and does not require a longitude or latitude input.
Pins
Pins are ideal for marking locations of interest, such as a plant or facility being monitored or controlled. Add a pin as you would any other object in a Map View, and assign it the longitude and latitude of the location.
To make the pin clickable and link it to a related Workview, edit the linkedView property:
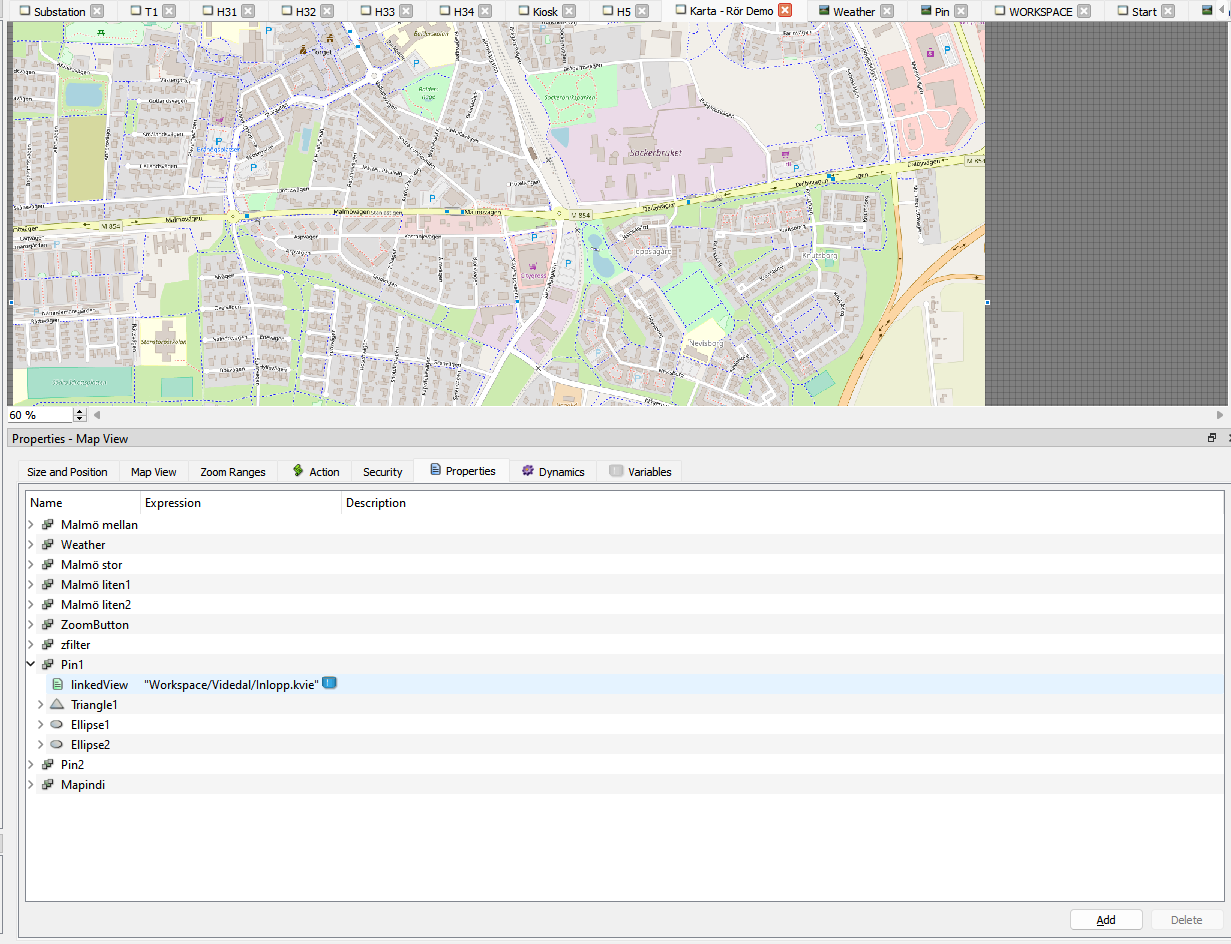
The value should be a path to a Workview in the Main_Menu or System
folder. In the example above, it points to the process Workview Inlopp,
located at System/Videdal/Inlopp.kvie.
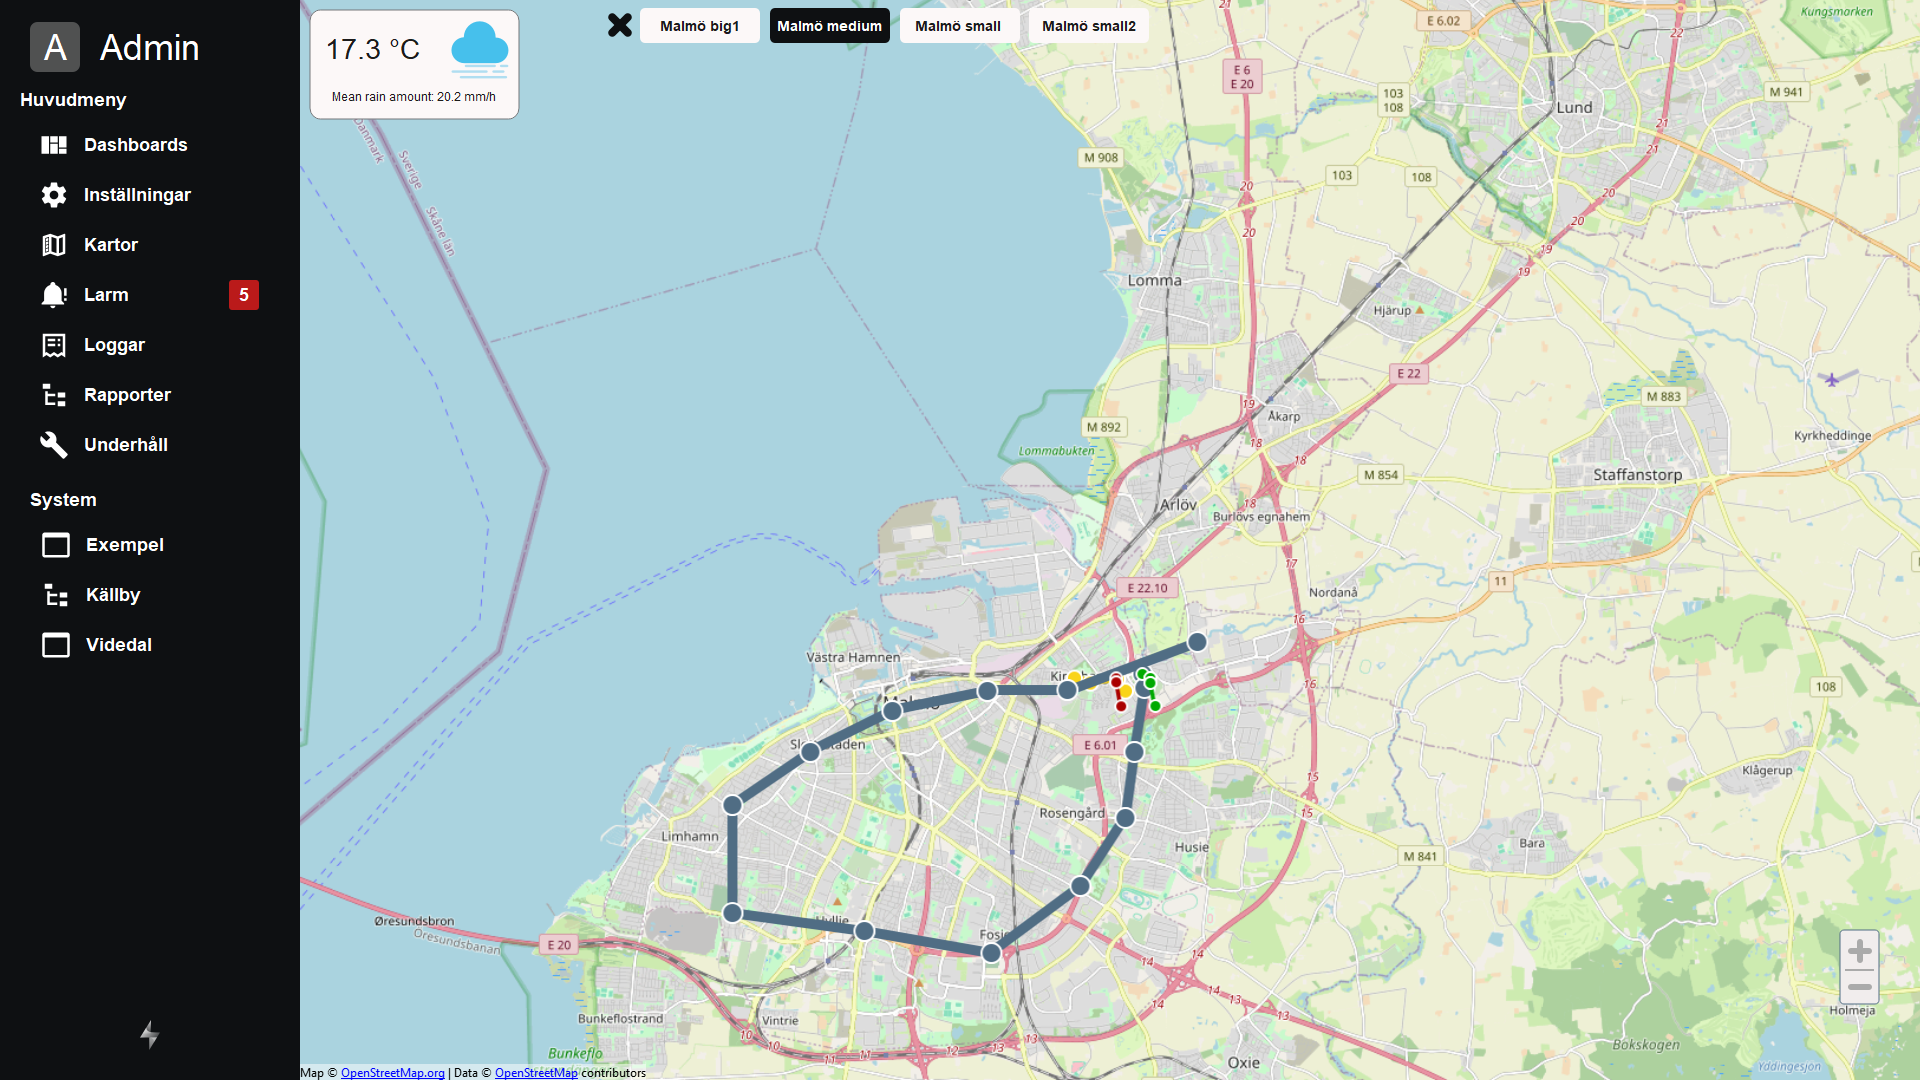
Weather Widget
The Weather Widget displays weather information for a given coordinate by accessing
the SMHI weather API. By default, the coordinates are taken from the centre of the
Map View object using the internal variables weatherLon and weatherLat, which
are set in the visibility dynamics script described
above.
The widget also needs to be pointed to its data source, which is the weather
Data Store variable by default. This is configured in the properties tab of the
Map View:

Once configured, the Weather Widget will display current weather information for the centre of the visible map area, updating automatically as the user navigates the map.
Next Steps
- Configuring — pin status indicators, cluster pins, lines, and alarm integration
- Extending — creating custom map indicators