Modbus
In WideQuick it's possible to add a Modbus connection. This can be done through either a TCP/IP or a Serial connection.
TCP/IP
In order to create a TCP/IP connection in WideQuick Designer® right click "Data Store" in the project tree and select "Add Modbus TCP/IP connection...". This will bring up the following window
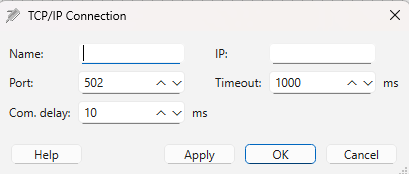
In this window the user can configure their connection. The configuration options are explained below
- Name - Give a name to the connection, this name must be unique for each connection
- IP - The IP address for the connection
- Port - The port the connection should be connected at the given IP address. The default port for Modbus is 502
- Timeout - Indicates the timeout of the connection in milliseconds
- Com. delay - Indicates the least amount of time to wait between each of the drivers update cycles. The exact delay varies depending on the computers performance and operating system
Once all configurations have been configured press apply then OK . This will create the connection which can be found under "Data Store" in the project tree.
Serial
The Serial connection can be created in WideQuick Designer® by right clicking "Data Store" in the project tree and select "Add Modbus Serial connection...". This will open a configuration window for a serial connection
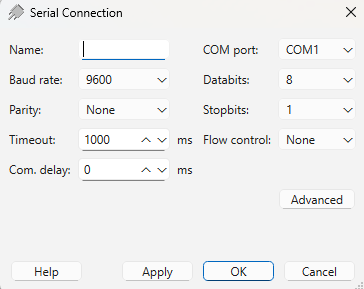
In this configuration window there are several options for the connection. The options will be explained below
- Name - Give a name to the connection, this name must be unique for each connection
- COM port - Indicates the port number. A maximum of one serial connection per COM port
- Baud rate - Indicates the baud rate through the communication port
- Databits - Indicate the number of bits for the transfer
- Parity - The error control, that will be used when communicating
- Stopbits - The number of stop bits, which indicates the end of a character
- Timeout - Indicates the timeout of the connection in milliseconds
- Flow control - What type of flow control to be used. None, RTS/CTS and RTS 485
- Com. delay - Indicates the least amount of time to wait between each of the drivers update cycles. The exact delay varies depending on the computers performance and operating system
- There is a advanced options which allows for low latency RTU framing as well
When the configuration is done press Apply and then OK to establish the connection. The connection can be found under "Data Store" in the project tree.
Add/Edit Device
Regardless if its a TCP/IP or a Serial connection, devices are added and edited in the same way. This is done through right clicking the modbus connection in the project tree and selecting "Add Device...". This will open the Device Configuration window. In this window the device can be configured.
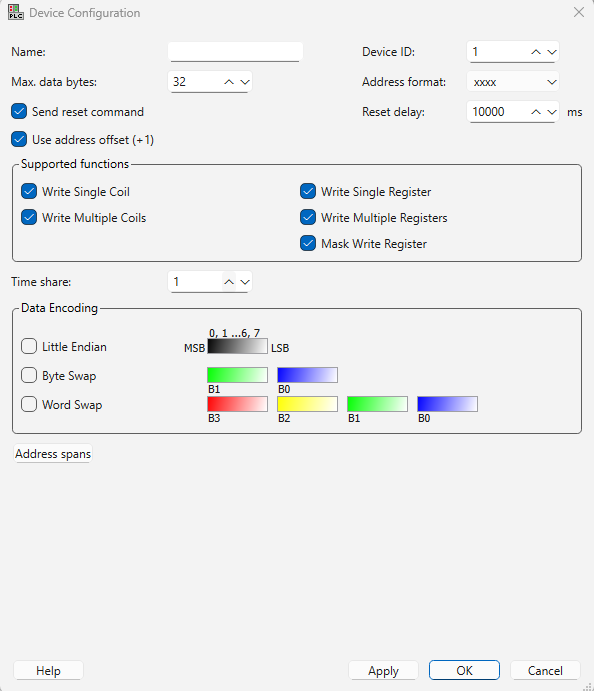
This guide will not go through all the options, but cover some of the more basic. A more in-depth guide can be found in the manual.
- Name - Name of the device, must be unique within the connection
- Device ID - The identification number. Must be unique within the connection
- Address format - Setting the address length of the tags. This setting allows WideQuick to assist the user with keeping the tag's address within the correct address band.
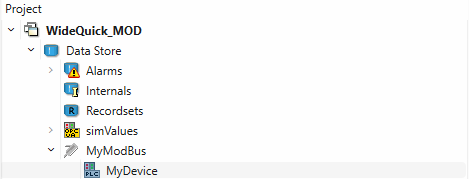
Once the configuration is done, press Apply then OK. This adds the device to the modbus connection. The device can be found in the project tree under "Data Store" -> "Modbus connection"
Modbus Variable Editor
Each added device to the Modbus may contain a number of different variables that it can communicate with. These variables can be added or edited in the variable editor. The variable editor is reached through the project tree by "Data Store" -> "Modbus connection" -> "Device"
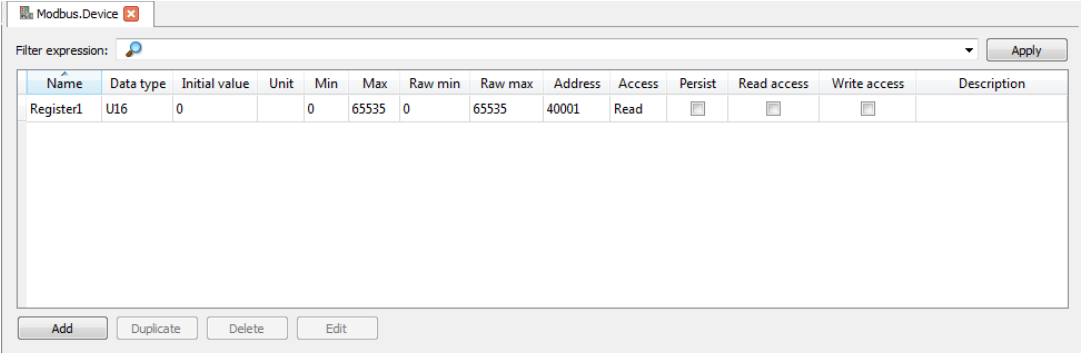
In the variable editor the user is able to add and edit variables for the system to communicate with. In the search bar the user is able to filter the visible variables by entering their filter and pressing Apply. If the user wants to create new variables press Add which will create a new row for the user to fill in the information about the variable. A further explanation for each configuration in the variable editor, see the WideQuick Manual