Navigation - Configuring
This section covers how to configure the Navigation module to fit your needs. This includes managing access control through privilege settings and configuring how restricted views are displayed to users.
Before getting started, make sure you are familiar with the basics of the Navigation module. If not, see Navigation — Get started.
Setting privilege requirements on views
Since the menu system is automatically generated, views cannot be hidden or disabled in the traditional way using the security tab. Instead, permissions are managed through WideQuick Runtime® settings.
To access these settings, start the project and navigate to Main Menu → Settings → Workviews → Workviews - Privilege.
Here you will see two menu groups: Main_Menu and System. Expand these to select a specific view or Workview folder, then assign the desired Privilege from the list. The Workview will then only be accessible to users with the correct privilege. Privileges can be applied to both individual Workviews and entire Workview folders.
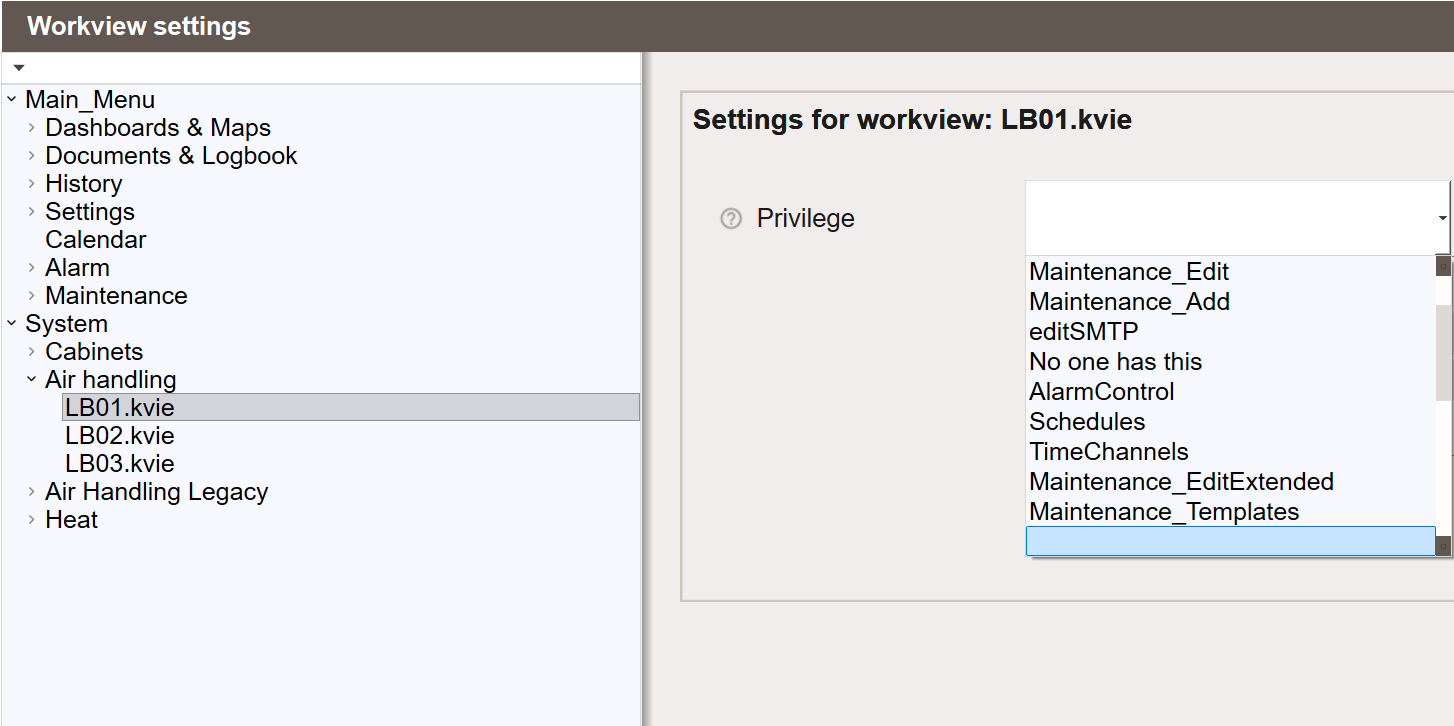
Encrypted projects
If your project is encrypted, WideQuick will not be able to suggest privileges. Instead, you must type in the name of the Privilege manually.
Privilege
The Privilege settings apply to both navigation systems.
Display settings for restricted views
There are several settings controlling how restricted folders are displayed for users without the required privilege. These settings can be found under Settings in WideQuick Runtime®.
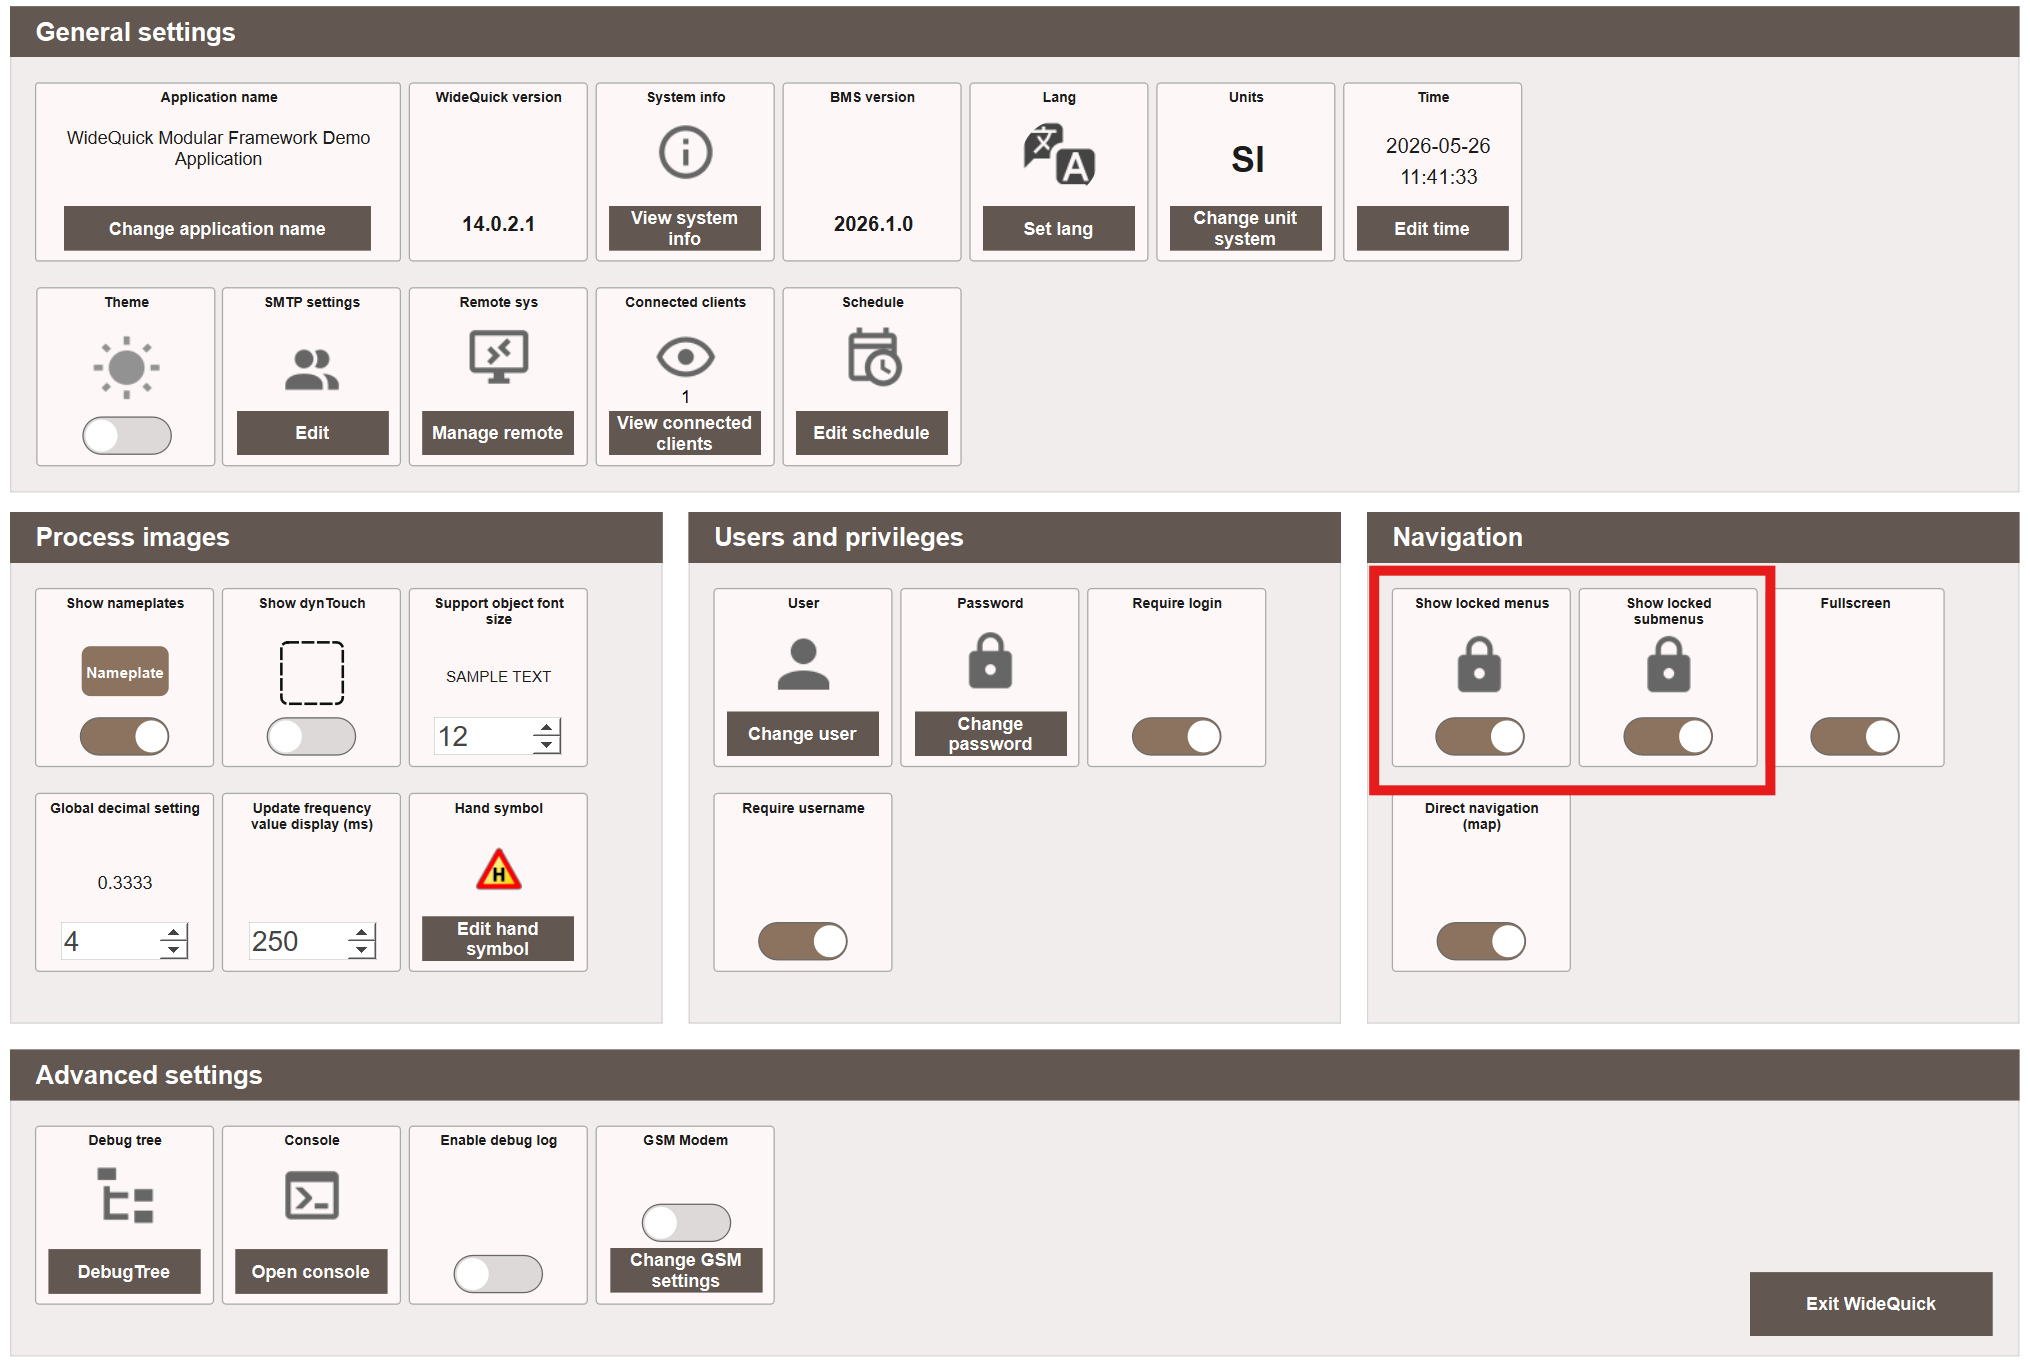
There are two toggle options: Show locked menus and Show locked submenus. These toggles offer three meaningful combinations. Note that if Show locked menus is disabled, its submenus will not be shown regardless of the Show locked submenus setting.
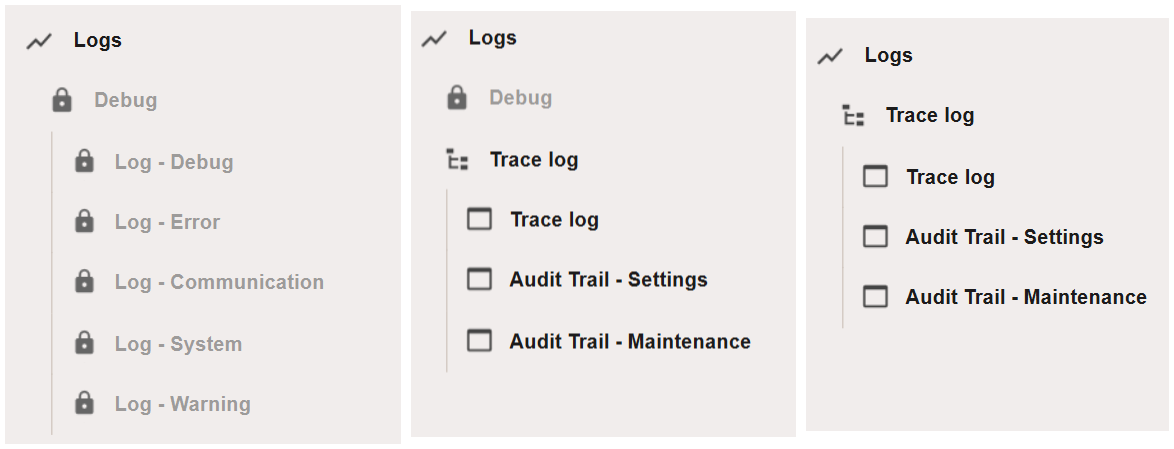
- Left — Both enabled.
- Middle — Show locked menus enabled, Show locked submenus disabled.
- Right — Show locked menus disabled — submenus not shown regardless.
Next Steps
- Extending — GoTo function and custom navigation icons