Reports - Configuring
This section covers how to configure the four report templates in WideQuick Mod to fit your needs, as well as how to use the built-in Report History to recreate or resend failed reports.
- Alarm_Report
- Alarm_Report_OneAlarm
- Energy_Report
- Energy_Report_Week
Alarm Report
The Alarm Report generates a complete overview of all alarms across the entire system. It includes a pie chart showing alarm distribution by alarm class (A–F by default) and a full list of all alarms triggered during the selected time period. The alarm classes can be customized to fit your needs.
By default, the Alarm Report fetches data from the database connected to the Larmlogg logger. If you want to store data in a different database, simply change where the Larmlogger stores its data — this will not affect the report itself.
However, if you want to set up a separate logger for alarms, the report must be updated accordingly. Follow these steps:
- Set up the new logger with the type Alarm and select your desired database. See Loggers for more information.
- Update the macro call in the report template (see image).
- Update the view called Alarm_Report to reference the new logger.
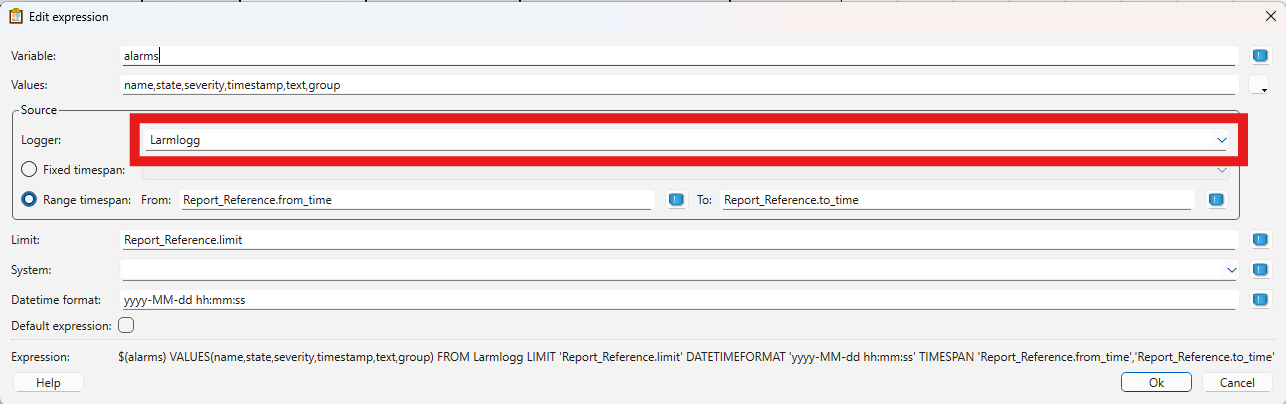
Macro
The Alarm Report template uses the alarms macro, which collects all alarms logged
through the selected logger.
To change the logger used in the macro, locate the macro command and change
FROM Larmlogg to FROM <YourLogger>. You can edit the text directly, or right-click
the cell containing the macro command and select Edit Expression to open the
expression editor.
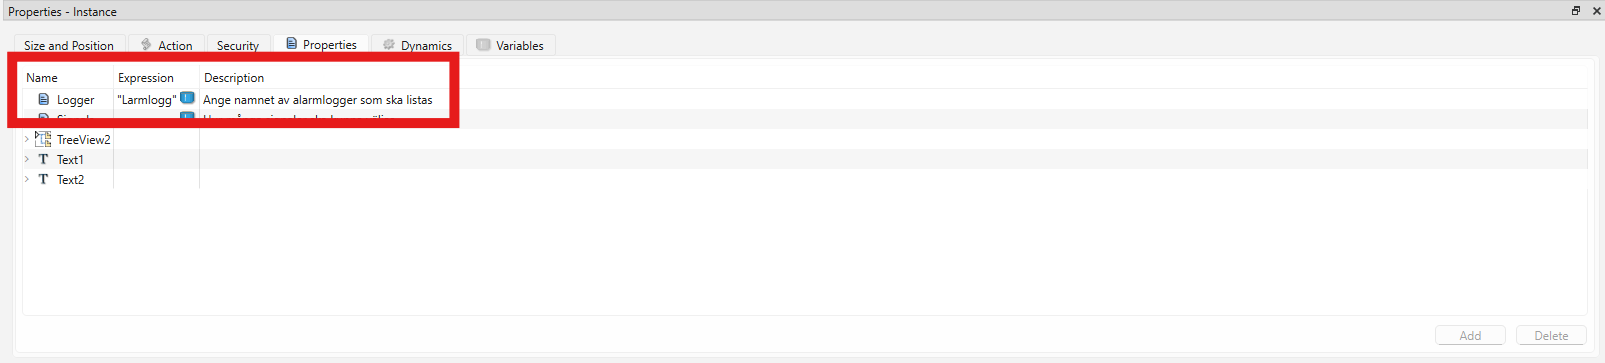
To change which logger appears when creating the report, navigate to
Workviews → Partials → ReportController → Alarm_Report in WideQuick Designer®.
Select the LarmLogger_list object, go to Properties, and update the Logger
property to the desired logger.
Naming convention
The name of the ReportController must match the name of the Report Template exactly, otherwise the report will not be generated.
Alarm Report One Alarm
This template is used when you need a report for a single specific alarm. It works similarly to the Alarm Report, with two key differences:
- The pie chart is not included.
- The macro queries a specific alarm rather than all alarms in the logger.
The process for changing the logger and database is the same as described for the Alarm Report.
Energy Report
The Energy Report templates are more complex than the Alarm Reports, as they manipulate data for presentation purposes. This section explains how to adjust the report to cover different time periods and how to change the logger.
By default, the Energy Report covers a three-year period. It includes an individual graph for each year as well as a three-year summary. Note that the template supports a maximum of three individual year graphs. For example, an Energy Report generated in May 2026 would display 2026 up to May, and full-year data for 2025 and 2024. To ensure the first year graph is fully populated, the end date should be set to the end of December.
Note
The Energy Report is configured for hourly values.
Changing Logger
To change the logger used by the Energy Report, follow the same steps as for the Alarm Report:
- Set up the new logger.
- Update the macro calls within the report template.
- Update the ReportController view.
Changing year span
The process of changing the year span of the Energy Report requires further manipulation of the template as well as changes to the ReportController. Here we will cover the following configurations:
Backup
Before manipulating the template it is recommended to save a copy as a backup.
- The current year only
- One year from the current date
Current year only
Manipulating the template to only show the current year is the easiest configuration. The report will only contain data from the year it is produced in. For example, a report produced on the 31st of September 2026 will only show data from the 1st of January 2026 to the 31st of September 2026.
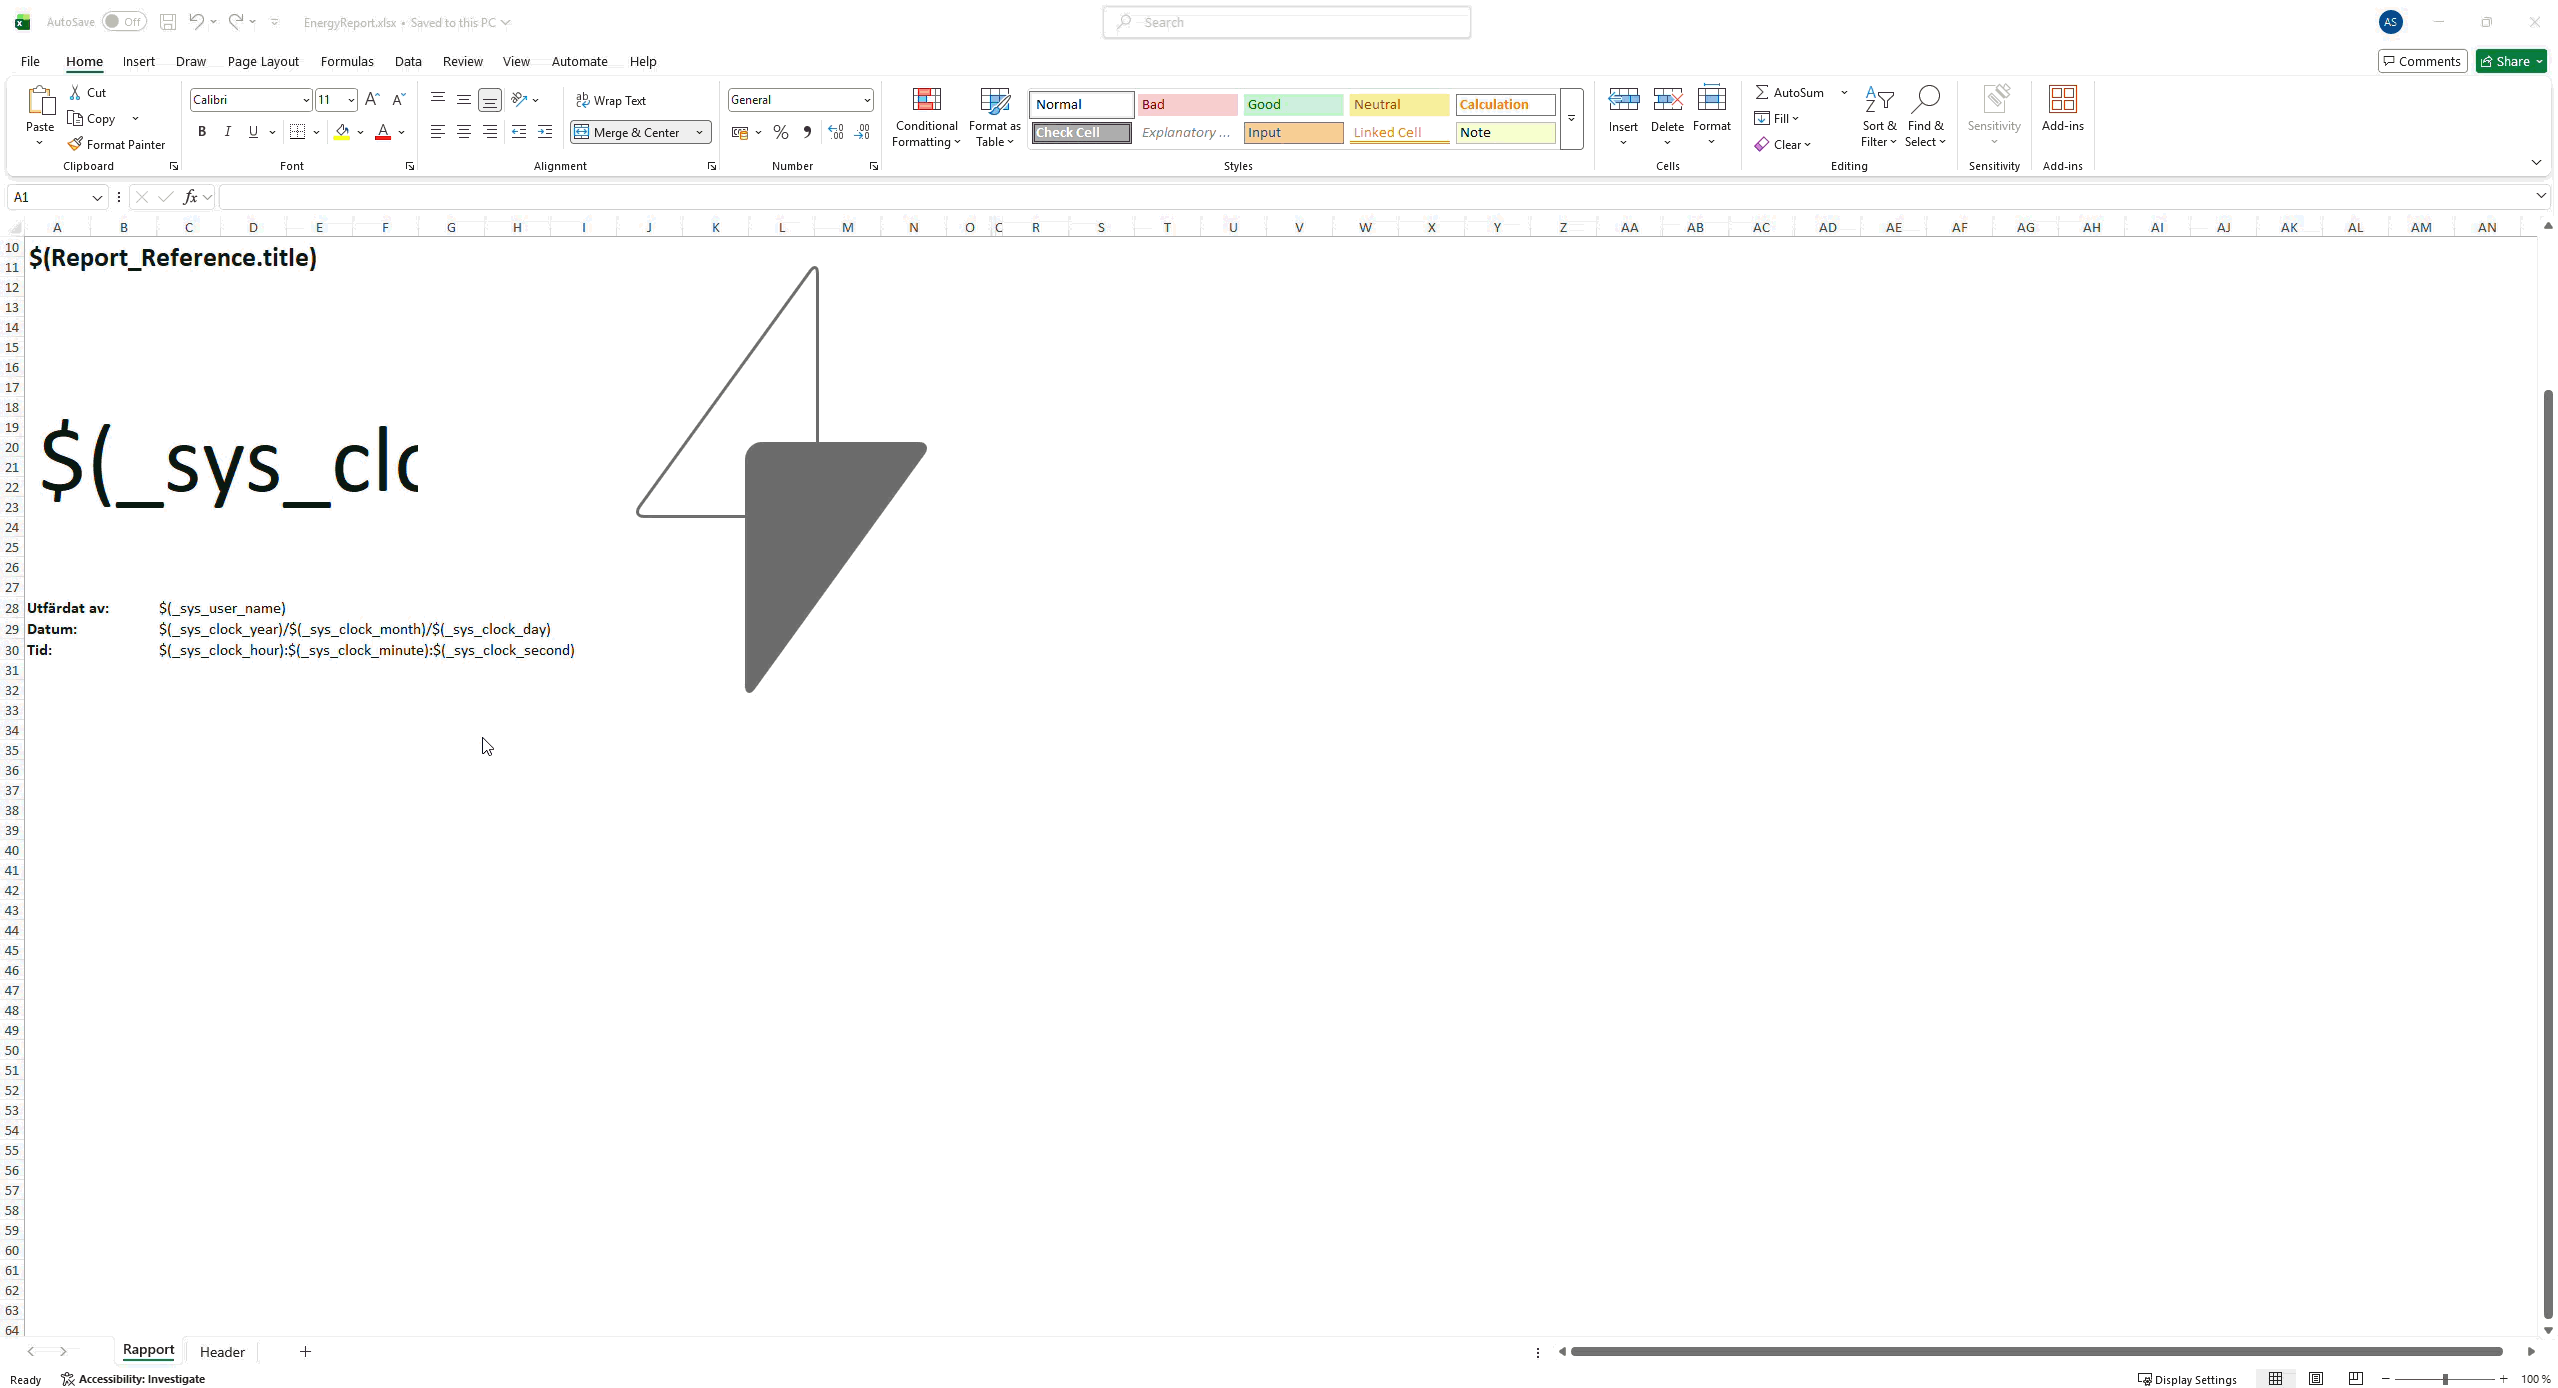
First navigate to \Your_Project\Reports\Templates and open EnergyReport.xlsx. Then
follow the GIF below:
Note
The template cannot be open in WideQuick Designer® when making changes in Excel.
Now the report template only shows the current year. However it still queries data from
three years prior, so further changes are required. Navigate to
Workviews → Partials → ReportController → Energy_Report in WideQuick Designer®.
Select the to_time_Singel object, go to Properties, and change the value of
YearsPrior to 1. The report is now configured to produce an Energy Report of the
current year.
One year from current day
This configuration produces a full year report regardless of what day it is produced on.
Open EnergyReport.xlsx located in \Your_Project\Reports\Templates. Rather than
selecting A:1 to Q:31, select A:97 to Q:127 and set that as the print area.
Then select row 113 in the header sheet and paste the following:
=IFERROR("Totalt -- "&TEXT(Meta!B13/86400000+DATE(1970,1,1),"yyyy-mm-dd")&" - "&TEXT(Meta!B14/86400000+DATE(1970,1,1),"yyyy-mm-dd"),"Totalt -- alla år")
Save the Excel file and open WideQuick Designer®. Navigate to
Workviews → Partials → ReportController → Energy_Report. Select the
to_time_Singel object and change the YearsPrior property to 1.
The reporter will now produce a full year report from the set date, containing one graph for that year.
Energy Report Week
The Energy Report Week follows the same structure as the Energy Report, but displays data on a weekly basis instead of yearly. By default it covers a three week period, containing an individual graph for each week as well as a three week summary. Like the Energy Report, it is configured for hourly values.
Changing Logger
To change the logger used by the Energy Report Week, follow the same steps as for the Alarm Report:
- Set up the new logger.
- Update the macro calls within the report template.
- Update the ReportController view.
Changing week span
The process of changing the week span follows the same steps as Changing year span, with two differences:
- The template file to modify is
WeeklyEnergyReport.xlsx, located in\Your_Project\Reports\Templates. - In the
to_time_Singelobject properties, use the WeeksPrior value instead of YearsPrior.
The two available configurations are:
- Current week only — The report will only contain data from the current week.
- One week from current day — The report will produce a full week report regardless of what day it is produced on.
Backup
Before manipulating the template it is recommended to save a copy as a backup.
Report History
The Report History is accessible from the Reports - Schedule workview. It displays a bar chart showing report statistics for the last 30 days, including daily values indicating whether each report was successfully generated and whether it was successfully sent.
Use the navigation buttons to select a specific day and view detailed information. The popup lists all reports for that day along with their status. Failed reports, sent emails, and failed emails can be reconfigured to be recreated or resent.
Next Steps
- Extending — creating custom templates and report controllers